
Installing a wall-mounted bedside table seems simple on paper: two screws, a level, and you’re done. However, the outcome depends on a factor that most guides address in one sentence: the type of wall. Plasterboard, hollow brick, concrete, or cinder block each require different anchors and fastening methods. This guide compares these situations and details the steps to install a bedside table to hang on the wall without any unpleasant surprises.
Wall fastening according to the support: comparison of methods
The furniture does not dictate the stability of the installation. It’s the wall that decides. Here’s a summary of the solutions suitable for each type of support.
Read also : How to Temporarily Increase Your Limit at La Banque Postale: Practical Guide and Tips
| Type of wall | Recommended anchor | Drilling tool | Load capacity |
|---|---|---|---|
| Concrete / solid cinder block | Metal expansion anchor | Hammer drill or percussion drill | High |
| Hollow brick | Toggle or chemical anchor | Non-percussion drill | Medium to high |
| Plasterboard (BA13) on rail | Molly or self-drilling anchor | Standard drill | Limited (a few kilos per point) |
| Plasterboard on wooden stud | Wood screws into the stud | Drill / screwdriver | Good (if stud is reached) |
On a plasterboard partition without a stud behind, the Molly anchor remains the most reliable fastening for a floating piece of furniture. It expands behind the board and distributes the load. Plastic screw anchors are suitable for a picture frame, but not for a bedside table that will hold a lamp, a book, and a glass of water.
On concrete, the risk of pulling out is almost nil with a properly sized expansion anchor. The difficulty lies elsewhere: you need a hammer drill, along with the noise that comes with it. On hollow brick, the chemical anchor (injected resin) offers remarkable hold, but the curing time means you can only load the furniture the next day.
Related reading : Practical guide to easily reset tire pressure on C5 Aircross
Choosing the right bedside table to hang on the wall also involves checking the empty weight of the furniture. A solid wood model can easily exceed the tolerance threshold of a simple plastic anchor in plasterboard.
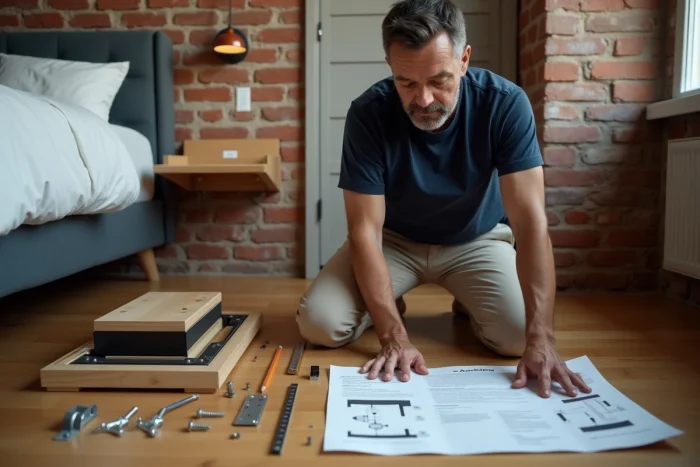
Marking and tracing: precision before drilling
The alignment of a wall-mounted bedside table does not tolerate approximation. A gap of a few millimeters between the two fastening points is enough to tilt the furniture, and this tilt is immediately noticeable in a room where the horizontal lines of the bed serve as a visual reference.
Locating the studs or load-bearing areas
Before drilling, use a stud finder over the entire installation area. On a plasterboard partition, aiming for a metal or wooden stud multiplies the load capacity compared to a fastening in the void of the board alone. If the furniture comes with a rear mounting rail, the rail must rest on at least one stud.
On a masonry wall, the detector is mainly used to locate electrical conduits and pipes. Drilling into a concealed cable remains the most dreaded scenario, and the most avoidable.
Marking with a laser level or bubble level
Place a mark at the desired height, usually aligned with the top of the mattress or slightly above. Draw a horizontal line with a pencil, checking with a bubble level. A laser level simplifies the operation when the bedside table has several spaced fastening points.
- Measure the distance between the fastening holes of the furniture (or the rear rail) and transfer it to the wall.
- Point each drilling location with an awl to prevent the drill bit from slipping at the start.
- Check that the chosen height leaves enough space between the bedside table and the bed to avoid obstructing access to the drawer or shelf.
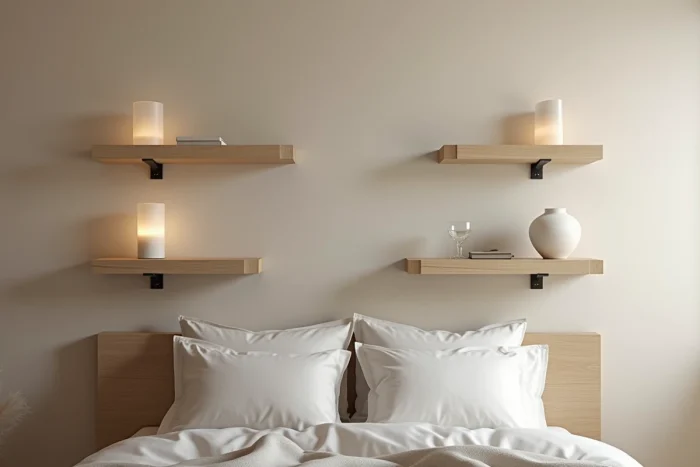
Invisible fastening or visible bracket: what each option implies
Invisible fixings (recessed rail, hidden threaded insert in the furniture) offer a clean look that gives the impression that the bedside table is floating against the wall. This system has become a standard on recent floating furniture, but it assumes that the manufacturer has provided for the reception of the rail at the back of the furniture.
An improperly installed invisible fastening cannot be corrected: if the rail is crooked, the entire piece of furniture tilts, and you have to fill the holes to start over. This is why the marking described above deserves particular care with this type of installation.
On the other hand, visible metal brackets are more forgiving. They allow for a vertical adjustment of a few millimeters thanks to elongated holes. For a raw wood or industrial-style metal bedside table, the bracket does not detract from the design. On a white lacquered model with a minimalist style, it disrupts the line.
Installation without drilling: the limits to know
Solutions without drilling (high-strength adhesives, suction cups, pressure fastening systems) exist, but feedback converges: a stable installation almost always requires a mechanical fastening. An industrial double-sided adhesive can hold a small empty tray weighing a few hundred grams. As soon as you place a bedside lamp and a book on it, the risk of peeling increases, especially in a room exposed to temperature or humidity variations.
For tenants who cannot drill, the least risky option is to fix the bedside table to a wooden panel itself supported by vertical battens resting from floor to ceiling. This system does not touch the wall and supports a reasonable weight, but it takes up more space than a simple suspended piece of furniture.
Height and positioning of the bedside table in the room
The ideal height for a wall-mounted bedside table is aligned with the top of the mattress. If it’s too low, it forces you to bend down to grab an item. If it’s too high, it loses its function as an accessible night surface from a lying position. Align the top of the furniture between the mattress level and a few centimeters above.
The free space under the furniture makes it easier to vacuum and gives a visual lightness in the room. This is one of the concrete advantages of a wall-mounted bedside table compared to a floor model: it clears space and reduces the risk of tipping over.
The choice of side (one bedside table or two symmetrical ones) depends on the configuration of the bed and the available width. Before drilling, simulate the position by holding the furniture against the wall with the help of a second person, then step back to check the visual balance from the entrance of the room.
The type of wall remains the determining factor for a successful installation. Identifying the support, selecting the appropriate anchor, and marking precisely represent the three steps that separate a solid wall-mounted bedside table from a piece of furniture that will eventually come loose.